Continued from “Building a Windows Service – Part 1: Getting started”
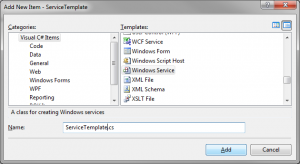
 So now that we’ve built ourselves a console application it’s time to add the service. Doing this is strait-forward and we can use the Visual Studio template for both the service and a basic installer. The first thing I’ve done is to create a folder called “Service” in my project where I intend to keep all the service specific aspects of this project. Right-clicking that folder and adding a “Windows Service” will give us a basic shell to work within. The first thing you should see is a grey designer window, if not you can select the project item for the service we created and select “View Designer”. Right-clicking on this grey designer window, selecting properties allows you to configure several aspects of the service, “CanShutdown”, “CanStop”, etc, etc… Set these up as desired, I just turn them all on except for “AutoLog” which I disable. The reason is that I want to control when and how the log is written rather than using the default.
We have a lot of work to do here and to start with we are going move the generated methods in the .Designer.cs file to the actual source file. Then we will delete all the files below the service (the .Designer.cs, and .resx if it exists). We are not going to hard-code our service name so that we can support multiple instances and this is the primary reason for removing the designer files. Allowing the service name to be changed dynamically by command-line options means that we can install multiple named instances on a single host. This, just like the console option, is primarily a development aid; however, it can also be very useful in a production environment. So here is what my service looks like:
class ServiceProcess : ServiceBase
{
    private readonly string[] _arguments;
    private ServiceImplementation _service;

    public ServiceProcess(IEnumerable arguments)
    {
        _arguments = arguments.ToArray();
        if (_arguments.Length == 0 || String.IsNullOrEmpty(_arguments[0]))
            throw new ArgumentException("Required parameter service name not provided.");

        AutoLog = false;
        CanStop = true;
        CanShutdown = true;
        CanHandlePowerEvent = true;
        CanHandleSessionChangeEvent = true;
        CanPauseAndContinue = true;

        ServiceName = _arguments[0];
    }

    private void InitializeComponent()
    {
        // For Designer only:
        ServiceName = "ServiceName";
    }

    protected override void Dispose(bool disposing)
    {
        if (_service != null)
            _service.Dispose();
        _service = null;

        base.Dispose(disposing);
    }

    protected override void OnStart(string[] args)
    {
        OnStop();
        _service = new ServiceImplementation();

        List allarguments = new List(_arguments);
        if(args != null && args.Length > 0)
            allarguments.AddRange(args);

        _service.Start(allarguments);
    }

    protected override void OnStop()
    {
        if(_service != null)
        {
            _service.Stop();
            _service.Dispose();
            _service = null;
        }
    }
}
You will probably notice the InitializeComponent() method has been left so as to initialize the service name for the designer. This really is not required as we aren’t planning to use the designer to change properties. The reason for still wanting to use the designer will be obvious in the next step as we build the installer. Without the service name the designer will fail to generate an installer for us.
Now that we have a ServiceBase derived class, we need a way to run this service from the command-line. To do this we will add a new method to the Commands class we created in step 1 and then add an entry to the dictionary map. The new method we will add first called “RunAsService”:
public static void RunAsService(ICollectionargs) { ServiceBase.Run(new Service.ServiceProcess(args)); }
Then as I said we need to add a command name and entry for this method into the Actions map. I chose to use “-service” as the command name, you can choose anything you like.
{"-service", Commands.RunAsService},
We now have a working service that can’t be installed. The default .NET service installer will not be able to install this service either so we need a good bit of work in the install. Let’s take a look at getting the installer together in the next step.
Continued on “Building a Windows Service – Part 3: Creating a Service Installer“