Keeping in line with our previous post “How to prevent users from killing your service or process” and continuing down the road of securing our service this post looks at the prevention of debugging. There are a lot of anti-debugging posts out there, most of them written in C++ and assembly and are therefor of little use to the managed world. One of the most complete I’ve seen is from Symantec “Windows Anti-Debug Reference | Symantec Connect Community” and an interesting one on stackoverflow “What is your favourite anti-debugging trick?“. These both fall short on providing any solution that is both easy to implement and built with managed code.

Let’s face it nothing is going to be bullet proof in this arena, and certainly not the solution I’m going to suggest. Yet it is easy and will prevent someone from attaching a debugger after the program is running. I’m really not concerned with trying to prevent a debug-session from startup. Why? Because you can’t. The debugger can jump past any code you have that tries to verify that a debugger is not currently active. Besides this it provides me very little value, I want to protect an actively running process (a service). If the user has the rights to stop it in the first place (i.e. they are an admin) then there isn’t anything I can do to stop them from debugging.

What I want is to prevent someone from attaching a debugger to this service to protect potentially sensitive information. How? Well as it turns out the easiest way to prevent a debug session from starting is with a debug session. So what we need is to debug ourselves! Oh wait you can’t :( but what you can do is easily spawn another process to debug this process while we debug that new process. This reciprocal or circular debug session will prevent either process from being debugged. Further, any attempt to kill either process will immediately terminate the other process thus thwarting an effort to kill one debugger so that you can attach one.

To accomplish this in managed code we have two choices, either using the managed debugger API or the native win32 debugger API. It turns out that the managed debugger is excessively complicated and requires an extraordinary amount of COM code to pull it off (see the mdbg sample) So I chose to go with a raw win32 debug session and see if we could pull that off easily with a few PInvoke calls. Sure enough, this is really easy.

So let’s jump in and take a look at the debugging API calls we are going to need…

const int DBG_CONTINUE = 0x00010002;
const int DBG_EXCEPTION_NOT_HANDLED = unchecked((int)0x80010001);

enum DebugEventType : int
{
    CREATE_PROCESS_DEBUG_EVENT = 3, //Reports a create-process debugging event. The value of u.CreateProcessInfo specifies a CREATE_PROCESS_DEBUG_INFO structure.
    CREATE_THREAD_DEBUG_EVENT = 2, //Reports a create-thread debugging event. The value of u.CreateThread specifies a CREATE_THREAD_DEBUG_INFO structure.
    EXCEPTION_DEBUG_EVENT = 1, //Reports an exception debugging event. The value of u.Exception specifies an EXCEPTION_DEBUG_INFO structure.
    EXIT_PROCESS_DEBUG_EVENT = 5, //Reports an exit-process debugging event. The value of u.ExitProcess specifies an EXIT_PROCESS_DEBUG_INFO structure.
    EXIT_THREAD_DEBUG_EVENT = 4, //Reports an exit-thread debugging event. The value of u.ExitThread specifies an EXIT_THREAD_DEBUG_INFO structure.
    LOAD_DLL_DEBUG_EVENT = 6, //Reports a load-dynamic-link-library (DLL) debugging event. The value of u.LoadDll specifies a LOAD_DLL_DEBUG_INFO structure.
    OUTPUT_DEBUG_STRING_EVENT = 8, //Reports an output-debugging-string debugging event. The value of u.DebugString specifies an OUTPUT_DEBUG_STRING_INFO structure.
    RIP_EVENT = 9, //Reports a RIP-debugging event (system debugging error). The value of u.RipInfo specifies a RIP_INFO structure.
    UNLOAD_DLL_DEBUG_EVENT = 7, //Reports an unload-DLL debugging event. The value of u.UnloadDll specifies an UNLOAD_DLL_DEBUG_INFO structure.
}

[StructLayout(LayoutKind.Sequential)]
struct DEBUG_EVENT
{
    [MarshalAs(UnmanagedType.I4)]
    public DebugEventType dwDebugEventCode;
    public int dwProcessId;
    public int dwThreadId;
    [MarshalAs(UnmanagedType.ByValArray, SizeConst = 1024)]
    public byte[] bytes;
}

[DllImport("Kernel32.dll", SetLastError = true)]
static extern bool DebugActiveProcess(int dwProcessId);
[DllImport("Kernel32.dll", SetLastError = true)]
static extern bool WaitForDebugEvent([Out] out DEBUG_EVENT lpDebugEvent, int dwMilliseconds);
[DllImport("Kernel32.dll", SetLastError = true)]
static extern bool ContinueDebugEvent(int dwProcessId, int dwThreadId, int dwContinueStatus);
[DllImport("Kernel32.dll", SetLastError = true)]
public static extern bool IsDebuggerPresent();

The structure DEBUG_EVENT above is actually only 96 bytes in total and the bytes 12 to 96 are actually a union. I did not need any real details about the specifics so I chose to use slam a blob here and not worry about it. The byte array could be reduced in theory to 84 bytes but I really didn’t care since we are only going to create a single one of these. The rest is pretty strait-forward PInvoke junk, nothing fancy.

Using the methods above to debug a process looks something like the following code:

// Start a thread to perform the debug loop
new Thread(DebuggerThread) { IsBackground = true, Name = "DebuggerThread" }
    .Start(processId);
// Debugging thread main loop
static void DebuggerThread(object arg)
{
    DEBUG_EVENT evt = new DEBUG_EVENT();
    evt.bytes = new byte[1024];
    // Attach to the process we provided the thread as an argument
    if (!DebugActiveProcess((int)arg))
        throw new Win32Exception();

    while (true)
    {
        // wait for a debug event
        if (!WaitForDebugEvent(out evt, -1))
            throw new Win32Exception();
        // return DBG_CONTINUE for all events but the exception type
        int continueFlag = DBG_CONTINUE;
        if (evt.dwDebugEventCode == DebugEventType.EXCEPTION_DEBUG_EVENT)
            continueFlag = DBG_EXCEPTION_NOT_HANDLED;
        // continue running the debugee
        ContinueDebugEvent(evt.dwProcessId, evt.dwThreadId, continueFlag);
    }
}

Frankly I had no idea how trivial this was to do. Once I had this working I was able to quickly build a method that takes my program arguments and detects if it is a parent or child process and act appropriately. For the child we need only debug our parent process, for the parent we need to both spawn the child and debug it. Ideally this would be done as a single step since it is possible to start a process as a debugee; however, I didn’t bother to figure out how to do that. If you know and don’t mind sharing please drop a comment. Since I do know how to start a process and I know how to debug an active process I chose that approach. It doesn’t seem like it would be any more or less secure, but I could be wrong on that point. Anyway the following is what my process start-up looks like…

static void Main(string[] args)
{
    NativeDebug.DebugSelf(args);
    ... stuff ...
}
public static void DebugSelf(string[] args)
{
    Process self = Process.GetCurrentProcess();
    // Child process?
    if (args.Length == 2 && args[0] == "--debug-attach")
    {
        int owner = int.Parse(args[1]);
        Process pdbg = Process.GetProcessById(owner);
        new Thread(KillOnExit) { IsBackground = true, Name = "KillOnExit" }.Start(pdbg);
        //Wait for our parent to debug us
        WaitForDebugger();
        //Start debugging our parent process
        DebuggerThread(owner);
        //Now is a good time to die.
        Environment.Exit(1);
    }
    else // else we are the Parent process...
    {
        ProcessStartInfo psi =
            new ProcessStartInfo(Environment.GetCommandLineArgs()[0], "--debug-attach " + self.Id)
                {
                    UseShellExecute = false,
                    CreateNoWindow = true,
                    ErrorDialog = false,
                    WindowStyle = ProcessWindowStyle.Hidden
                };
        // Start the child process
        Process pdbg = Process.Start(psi);
        if (pdbg == null)
            throw new ApplicationException("Unable to debug");
        // Monitor the child process
        new Thread(KillOnExit) {IsBackground = true, Name = "KillOnExit"}.Start(pdbg);
        // Debug the child process
        new Thread(DebuggerThread) {IsBackground = true, Name = "DebuggerThread"}.Start(pdbg.Id);
        // Wait for the child to debug us
        WaitForDebugger();
    }
}
static void WaitForDebugger()
{
    DateTime start = DateTime.Now;
    while (!IsDebuggerPresent())
    {
        if ((DateTime.Now - start).TotalMinutes > 1)
            throw new TimeoutException("Debug operation timeout.");
        Thread.Sleep(1);
    }
}
static void KillOnExit(object process)
{
    ((Process)process).WaitForExit();
    Environment.Exit(1);
}

So we’ve written about 100 lines of code or so and spent almost no time at all getting it up and running, a good ROI for this kind of stuff. It worked quite well even running under the NETWORK SERVICE account as a service. It certainly stops me from debugging it although I’m certainly not what I’d call an accomplished hacker. Given the time and effort to put this together I’d have to call it a win for active debugger prevention. The down side of course is that there are now two processes running and trying to tell them apart is difficult at first launch.

If you’re going to do something like this, I would suggest adding an ‘if (!IsDebuggerPresent())’ to the else clause of our DebugSelf method above. This would allow you to launch with a debugger but not to attach one at a later time. Have fun with it and as with any code on this site, “Don’t blame me”. I didn’t make you use it ;)

My own intentions for this are to make a reasonable effort to secure a service running in a controlled but insecure environment. I would never ship something like this to a customer and hope you would not either. Preventing a consumer from accessing software they purchased is not at all what I’m after. IMHO if information is on their machine it is theirs to debug and view all they want.

One more thing, in case you are wondering this was not my idea. I read about doing this in a security article some years ago but I can’t seem to locate it.


Before I say another word, I have read “The arms race between programs and users” and wholeheartedly agree. You can not, and should not, attempt to stop an Administrator from killing your process or stopping your service. That is not what we are trying to do here, we are trying to prevent Joe User from disrupting our process.

So let’s get started, to do this we want to adjust our process’ access control list. The individual rights we can grant and deny are discussed on MSDN in the articled titled “Process Security and Access Rights“. Though most of that article is about creating a process with specific rights, in this case we want to modify the rights of our current process. To do this we are going to PInvoke GetKernelObjectSecurity to obtain the DACL (Discretionary Access Control List), modify it using the RawSecurityDescriptor, and finally write it back using the SetKernelObjectSecurity API. This should be somewhat familiar to those of you that followed that part of building our service.

Step 1 – Obtaining the process DACL

[DllImport("advapi32.dll", SetLastError = true)]
static extern bool GetKernelObjectSecurity(IntPtr Handle, int securityInformation, [Out] byte[] pSecurityDescriptor,
                                           uint nLength, out uint lpnLengthNeeded);

public static RawSecurityDescriptor GetProcessSecurityDescriptor(IntPtr processHandle)
{
    const int DACL_SECURITY_INFORMATION = 0x00000004;
    byte[] psd = new byte[0];
    uint bufSizeNeeded;
    // Call with 0 size to obtain the actual size needed in bufSizeNeeded
    GetKernelObjectSecurity(processHandle, DACL_SECURITY_INFORMATION, psd, 0, out bufSizeNeeded);
    if (bufSizeNeeded < 0 || bufSizeNeeded > short.MaxValue)
        throw new Win32Exception();
    // Allocate the required bytes and obtain the DACL
    if (!GetKernelObjectSecurity(processHandle, DACL_SECURITY_INFORMATION,
                                        psd = new byte[bufSizeNeeded], bufSizeNeeded, out bufSizeNeeded))
        throw new Win32Exception();
    // Use the RawSecurityDescriptor class from System.Security.AccessControl to parse the bytes:
    return new RawSecurityDescriptor(psd, 0);
}

And you thought that was going to be hard? Of course we also need to be able to save the DACL. So…

Part 2 – Updating the process DACL

[DllImport("advapi32.dll", SetLastError = true)]
static extern bool SetKernelObjectSecurity(IntPtr Handle, int securityInformation, [In] byte[] pSecurityDescriptor);

public static void SetProcessSecurityDescriptor(IntPtr processHandle, RawSecurityDescriptor dacl)
{
    const int DACL_SECURITY_INFORMATION = 0x00000004;
    byte[] rawsd = new byte[dacl.BinaryLength];
    dacl.GetBinaryForm(rawsd, 0);
    if (!SetKernelObjectSecurity(processHandle, DACL_SECURITY_INFORMATION, rawsd))
        throw new Win32Exception();
}

Cool, that was easy, so we are ready now right? Not quite, we still need to get the process handle. A simple thing for our own process:

Part 3 – Getting the current process

[DllImport("kernel32.dll")]
public static extern IntPtr GetCurrentProcess();

It just gets easier and easier. Since this is the current process there (AFAIK) is not any reason to duplicate handle and request additional permissions. This handle should have access to do anything. So the only thing left before we can modify the permissions is to define what those permissions are.

Part 4 – Process access rights

[Flags]
public enum ProcessAccessRights
{
    PROCESS_CREATE_PROCESS =0x0080, //	Required to create a process.
    PROCESS_CREATE_THREAD = 0x0002, //	Required to create a thread.
    PROCESS_DUP_HANDLE = 0x0040, //	Required to duplicate a handle using DuplicateHandle.
    PROCESS_QUERY_INFORMATION = 0x0400, //	Required to retrieve certain information about a process, such as its token, exit code, and priority class (see OpenProcessToken, GetExitCodeProcess, GetPriorityClass, and IsProcessInJob).
    PROCESS_QUERY_LIMITED_INFORMATION = 0x1000, //	Required to retrieve certain information about a process (see QueryFullProcessImageName). A handle that has the PROCESS_QUERY_INFORMATION access right is automatically granted PROCESS_QUERY_LIMITED_INFORMATION. Windows Server 2003 and Windows XP/2000:  This access right is not supported.
    PROCESS_SET_INFORMATION = 0x0200, //	Required to set certain information about a process, such as its priority class (see SetPriorityClass).
    PROCESS_SET_QUOTA = 0x0100, //	Required to set memory limits using SetProcessWorkingSetSize.
    PROCESS_SUSPEND_RESUME = 0x0800, //	Required to suspend or resume a process.
    PROCESS_TERMINATE = 0x0001, //	Required to terminate a process using TerminateProcess.
    PROCESS_VM_OPERATION = 0x0008, //	Required to perform an operation on the address space of a process (see VirtualProtectEx and WriteProcessMemory).
    PROCESS_VM_READ = 0x0010, //	Required to read memory in a process using ReadProcessMemory.
    PROCESS_VM_WRITE = 0x0020, //	Required to write to memory in a process using WriteProcessMemory.
    DELETE = 0x00010000, //	Required to delete the object.
    READ_CONTROL = 0x00020000, //	Required to read information in the security descriptor for the object, not including the information in the SACL. To read or write the SACL, you must request the ACCESS_SYSTEM_SECURITY access right. For more information, see SACL Access Right.
    SYNCHRONIZE = 0x00100000, //	The right to use the object for synchronization. This enables a thread to wait until the object is in the signaled state.
    WRITE_DAC = 0x00040000, //	Required to modify the DACL in the security descriptor for the object.
    WRITE_OWNER = 0x00080000, //	Required to change the owner in the security descriptor for the object.
    STANDARD_RIGHTS_REQUIRED = 0x000f0000,
    PROCESS_ALL_ACCESS = (STANDARD_RIGHTS_REQUIRED | SYNCHRONIZE | 0xFFF),//	All possible access rights for a process object.
}

Part 5 – Put it all together

// Get the current process handle
IntPtr hProcess = GetCurrentProcess();
// Read the DACL
var dacl = GetProcessSecurityDescriptor(hProcess);
// Insert the new ACE
dacl.DiscretionaryAcl.InsertAce(
    0,
    new CommonAce(
        AceFlags.None,
        AceQualifier.AccessDenied,
        (int)ProcessAccessRights.PROCESS_ALL_ACCESS,
        new SecurityIdentifier(WellKnownSidType.WorldSid, null),
        false,
        null)
);
// Save the DACL
SetProcessSecurityDescriptor(hProcess, dacl);

The ace we’ve added now will try to deny access to the “Everyone” group (aka WorldSid) to do anything with our process. We need not fear that we are interrupting an administrator’s ability to perform any action they desire. They will have any access required that’s why we call them administrators :) As I said in the beginning, we are not trying to stop Administrators, we just want to make sure they are an administrator if they plan to modify or kill this process.

We could of course be more discrete about the rights we are trying to deny, that is entirely up to you.


Continued from “Building a Windows Service – Part 6: Adding resources and event logging

So let’s recap our goals for this project:

  • Building a service that can also be used from the console
  • Proper event logging of service startup/shutdown and other activities
  • Allowing multiple instances by using command-line arguments
  • Self installation of service and event log
  • Proper event logging of service exceptions and errors
  • Controlling of start-up, shutdown and restart options
  • Handling custom service commands, power, and session events
  • Customizing service security and access control

Yep, we are on the mark there and have demonstrated most of these in the past few posts. The goal not stated directly has always been to to create a new project template. We had a bit of cleaning up to do before we could deal with that. I’m not going to cover this clean up in the same level of detail as before, but here are a few words about how this has changed from the previous posts:

  1. I’ve added an application icon and manifest. This brought to light that the generator for the win32 resources was not preserving the manifest, nor was it correctly locating the icon when I moved the resources file. To get this working I’ve built a custom version of the CSharpTest.Net.Generators executable.
  2. For all the good it does, I’ve added an UnhandledException event listener on the AppDomain to attempt to log the exception. As you probably know this is unreliable at best ;)
  3. I’ve split all the resources into three parts, messages that are written, exceptions that log, and normal non-logging string resources. These have been to a Resources folder and all resource/event specific stuff is now located there.
  4. The remainder of the service stub class, “ServiceImplementation” has been filled out to include power and session events, custom commands, etc. The appropriate logging and plumbing has been introduced into the ServiceProcess class to support these new methods.
  5. There are a couple of other small changes and always bugs, and I’ve had to fix a few from the previous posts.

The end result is a clean easy to use project template for Visual Studio 2008. This can easily be upgraded to 2010 if you desire. The project is currently using the 2.0 Framework to allow the greatest flexibility, but obviously once you create the project from the template it can be changed.

zip Download the Visual Studio Service Project Template
To use the template place it in the following path for 2008:
%UserProfile%\My Documents\Visual Studio 2008\Templates\ProjectTemplates\Visual C#

Once installed, create a new project, locate the template “ServiceTemplate” and create a project. Since the project name is used heavily throughout the template you should avoid names that contain non-alpha-numeric text or are longer than 64 characters. You can always rename the project file, assembly, and default namespace later, but start with a simple name. After the project has been created there are two things to do from the command line. Assuming a working directory at the root of the project the following commands should be run:

C:\Projects\MyService> Tools\CmdTool.exe register
C:\Projects\MyService> Tools\CmdTool.exe build MyService.csproj
Generating C:\Projects\MyService\Resources\Exceptions.resx
Generating C:\Projects\MyService\Resources\FormatString.resx
Generating C:\Projects\MyService\Resources\Messages.resx

Now you can build and run the project with the ‘install’ command and away you go. Modify the ServiceImplementation class to provide the service implementation. Adjust the default IsolateDomain, and ShadowCopy settings to your desired defaults. Don’t forget if you want to debug service start-up you can run the command “start {servicename} DEBUG!” and, if the service is not running, a debug break-point will be triggered.

It’s not often I have to create a windows service, yet each time it takes me several days to work all this out. I hope this will save you some time as well, enjoy.

PS: If you’ve missed any of the previous posts, here they are:


Continued from “Building a Windows Service – Part 5: Adding command-line installation

So we have a working service it’s time to start adding some logging. Proper event logging is critical to monitoring services so we are not going to use .NET’s typical excuse for events. Rather we are going to build a ‘real’ message dll from our server, register it as a message event source, and have a real event log. Sounds crazy I know, but all the hard work has already been done by CSharpTest.Net.Generators.exe. We are also going to use CmdTool.exe to integrate integrate into Visual Studio.

The first thing we are going to need to do is to pull three binaries from my library (available here). The three we are after are CmdTool.exe, CSharpTest.Net.Generators.exe, and CSharpTest.Net.Library.dll which the Generators assembly depends upon. I’m going to just create a folder in the project directory called “Tools” and add these files there. If you’ve never used CmdTool before you will need to register it by running “CmdTool.exe Register” from an administrative command prompt.

Creating CmdTool.config
To use CmdTool for our resources we need a configuration file that tells it what to do. This is fairly trivial and is explained in some detailed here: “CmdTool.exe Configuration“. So we are going to copy/paste this default configuration and save it into a file called “CmdTool.config” in the root of our project. Here is our configuration file:

<?xml version="1.0" encoding="utf-8" ?>
<CmdTool xsi:noNamespaceSchemaLocation="http://csharptest.net/downloads/schema/CmdTool.xsd" xmlns:xsi="http://www.w3.org/2001/XMLSchema-instance">
  <match filespec="*.resx">
    <generator debug="false">
      <execute exe=".\Tools\CSharpTest.Net.Generators.exe" />
      <arg value="ResX"/>
      <arg value="-input=$(InputPath)"/>
      <arg value="-namespace=$(Namespace)"/>
      <arg value="-class=$(ClassName)"/>
      <arg value="-public=true"/>
      <arg value="-partial=true"/>
      <arg value="-test=true"/>
      <arg value="-sealed=true"/>
      <arg value="-base=System.ApplicationException"/>
      <arg value="-rxns=$(DefaultNamespace)"/>

      <std-output extension=".Designer.cs"/>
    </generator>
  </match>
</CmdTool>


Once our configuration is there we need to create standard Resources.resx file just as you always would. In order for CmdTool to find the configuration file above it must be in the same directory, or a parent directory, of the resource file. I’m just adding the Resources.resx file in the root of the project.

After we’ve added the Resources.resx file to the project we now need to modify the “Custom Tool” property for the solution item. Right-click on the resx file and select “Properties”. You should the option there, just type ‘CmdTool’ in the value next to Custom Tool. Make sure you’ve registered CmdTool or you will get an error. The end result should look like this:

Once this is changed, you’re output window should display “Generating C:\{some path}\Resources.resx” with the full path to the location of the resx file. Once that is working we already have a lot of bang for our buck. Creating a resource string like “String1″, “{0}” will now create a static method with the signature ‘string Resources.String1(object _0)’. That is neat, we can even create exceptions just by renaming “String1″ to “String1Exception” and presto-magic happens and you have a complete exception class. I can’t live without this thing, I’ve used it sparingly in the open but I use it extensively in my day job as well as private projects. We have over 250 custom exceptions, each have a unique HRESULT that can be written to the Event Log and monitored. This is what we are after, Adding support for the event logging part.

Before we go any farther with this you should be very familiar with what is an HRESULT, what it’s composite parts are, and what their constraints are. Most of this is documented in the help for Message Text Files which is exactly what we are going to be generating.

So let’s get started turning our resx into an event log writer. Step 1, we need to add some information, the easiest way is to just copy/paste the following settings into the “View Source” xml view:

  <assembly alias="mscorlib" name="mscorlib, Version=2.0.0.0, Culture=neutral, PublicKeyToken=b77a5c561934e089" />
  <data name=".EventCategory" type="System.Int32, mscorlib">
    <value>1</value>
    <comment>General</comment>
  </data>
  <assembly alias="System" name="System, Version=2.0.0.0, Culture=neutral, PublicKeyToken=b77a5c561934e089" />
  <data name=".EventSource" type="System.Uri, System">
    <value>ServiceTemplate/ServiceTemplate</value>
  </data>
  <data name=".AutoLog" type="System.Boolean, mscorlib">
    <value>True</value>
  </data>
  <data name=".AutoLogMethod" type="System.Uri, System">
    <value>EventLogging.WriteEvent</value>
  </data>
  <data name=".Facility" type="System.Int32, mscorlib">
    <value>256</value>
    <comment>General</comment>
  </data>
  <data name=".HelpLink" type="System.Uri, System">
    <value>http://example.com/?HResult={0:x8}</value>
  </data>
  <data name=".NextMessageId" type="System.Int32, mscorlib">
    <value>2</value>
  </data>
  <data name=".EventMessageFormat" xml:space="preserve">
    <value>
More Information: {1}
Excpetion Type: {2}
Base Type: {3}
Stack Trace: {4}
{5}</value>
  </data>

Once the above has been inserted into the resx file you can verify proper behavior by adding any resource string. When you save the resx file, a Comment value should magically appear, something like “#MessageId=1″. Do not change or remove, these ids should not be reused to avoid confusion with old event logs, the “.NextMessageId” controls the next id that will be assigned. Occasionally, if you’re custom exception crazy, you may run into source merge conflicts. At that point you need to make sure all messages have a unique id (it will fail if this is not the case) and that the “.NextMessageId” value is higher than all existing ids.

The “.AutoLogMethod” above, “EventLogging.WriteEvent” is to allow us to customize the values provided to the event log. This method is called when either a method is called to format a string, or when an exception is constructed (not thrown). Because we are augmenting the data in the message with the “.EventMessageFormat” above we are required to write this method. We could simply remove both the “.AutoLogMethod” and “.EventMessageFormat” and it would just create the log and write it for us. By customizing this however we can get some fixed fields on our exceptions that will help in monitoring and triggering of alerts. So here is our custom EventLogging class that will provide some fixed values and also provide a serialized exception as the binary data for the event.

public class EventLogging
{
    private static readonly Dictionary<string, EventLog> _logs = new Dictionary<string,EventLog>(StringComparer.Ordinal);

    public static void WriteEvent(string eventLog, string eventSource, int category, EventLogEntryType eventType, long eventId, object[] arguments, Exception error)
    {
        EventLog log;
        lock(_logs)
        {
            if(!_logs.TryGetValue(eventLog + '.' + eventSource, out log))
                _logs.Add(eventLog + '.' + eventSource, log = new EventLog(eventLog, ".", eventSource));
        }

        const int fixedCount = 6;
        object[] fullargs = new object[arguments.Length + fixedCount];
        int ix = 0;
        fullargs[ix++] = eventId.ToString("x8");
        fullargs[ix++] = error == null ? null : error.HelpLink;
        fullargs[ix++] = error == null ? null : error.GetType().ToString();
        fullargs[ix++] = error == null ? null : error.GetBaseException().GetType().ToString();
        fullargs[ix++] = error == null ? null : error.StackTrace;
        fullargs[ix++] = new StackTrace(3).ToString();
        Array.Copy(arguments, 0, fullargs, fixedCount, arguments.Length);

        byte[] data = null;
        if (error != null)
        {
            try
            {
                using (MemoryStream ms = new MemoryStream())
                {
                    BinaryFormatter ser = new BinaryFormatter();
                    ser.Serialize(ms, error);
                    data = ms.ToArray();
                }
            }
            catch { }
        }

        lock(log)
            log.WriteEvent(new EventInstance(eventId, category, eventType), data, fullargs);
    }
}

Now we can build again, and the biggest thing left is getting these .NET resources turning into Win32 message resources. We have two options here, option 1 is to produce a stand-alone message dll. This can work well in some cases, but I really want an all-in-one approach here so I’m going to embed the messages into this managed assembly. File versions, app icons, etc should survive; however, be aware that this tool builds a win32 resource that must later be bound to this project. To get the generator producing resources we just need to add a pre-build event.

$(ProjectDir)Tools\CSharpTest.Net.Generators.exe ProjectResX "$(ProjectPath)" /name=Messages\Resources "/tools=$(Registry:HKEY_LOCAL_MACHINE\SOFTWARE\Microsoft\Microsoft SDKs\Windows@CurrentInstallFolder)Bin"

Here I’m using the Windows SDK versions of RC.exe and MC.exe which are both required. You could optionally change the tools path to another location if desired so long as both of these tools exist. After you define the pre-build event above build the project. Assuming that worked there is a new directory below the project file called “Messages”. This Messages directory contains two C# files we need to add to this project, Resources.Constants.cs, and Resources.InstallUtil.cs. Include these by clicking the “Show All Files” option and right-click to select “Include in Project”. Now we need to manually add an entry to our project. First right-click the project and select “Unload Project”. Then right-click again and select “Edit XXX.csproj” to view the file in XML. At the end of the first PropertyGroup element we need to add the following:

  <PropertyGroup>
    ...
    <Win32Resource>$(ProjectDir)Messages\Resources.res</Win32Resource>
  </PropertyGroup>

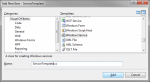
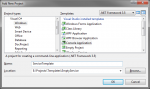
This can be done in the project properties dialog, however, if you have assigned an icon, manifest, or something it will be erased. This ensures those properties remain although you will not be able to edit them. Now rebuild the project. You can verify that the resources are properly being created by using the File -> Open -> File… command and selecting the .exe file you just built. You should see at least the resources depicted to the right.

Now that we’ve built it we can simply run the .exe file with the ‘install’ argument to register both the service and the event log/source. Before we do that it would be nice to have something in that event log to see. So let’s start with adding a resource string for service startup and shutdown. I’m going to start with the following messages in the resources.resx file:

ServiceStartFailedException The service {0} failed to start. #MessageId=1
ServiceStarted The service {0} started successfully. #MessageId=2
ServiceStopped The service {0} has stopped. #MessageId=3

Now we are going to update the service process to add the logging:

protected override void OnStart(string[] args)
{
    try
    {
        OnStop();
        _service = new ServiceImplementation();

        List allarguments = new List(_arguments);
        if (args != null && args.Length > 0)
            allarguments.AddRange(args);

        _service.Start(allarguments);
        Resources.ServiceStarted(ServiceName);
    }
    catch(Exception e)
    {
        throw new ServiceStartFailedException(ServiceName, e);
    }
}

protected override void OnStop()
{
    if (_service == null)
        return;
    try
    {
        _service.Stop();
        _service.Dispose();
        _service = null;
    }
    finally
    {
        Resources.ServiceStopped(ServiceName);
    }
}

Once this has been added we will build and run the following to install, start, and stop the service. After that we are going to the Win7/Win2008 command-line tool to export the log to xml so we can peek at the events.

ServiceTemplate.exe
net start ServiceTemplate
net stop ServiceTemplate
Wevtutil.exe qe ServiceTemplate /f:RenderedXml

The output of Wevtutil.exe should display something like the following:

<Event xmlns='http://schemas.microsoft.com/win/2004/08/events/event'>
  <System>
    <Provider Name='ServiceTemplate'/>
    <EventID Qualifiers='16640'>3</EventID>
    <Level>4</Level>
    <Task>1</Task>
    <Keywords>0x80000000000000</Keywords>
    <TimeCreated SystemTime='2011-11-17T22:10:47.000000000Z'/>
    <EventRecordID>3</EventRecordID>
    <Channel>ServiceTemplate</Channel>
    <Computer>HOSTNAME</Computer>
    <Security/>
  </System>
  <EventData>
    <Data>41000003</Data>
    <Data></Data>
    <Data></Data>
    <Data></Data>
    <Data></Data>
    <Data>
      at ServiceTemplate.Service.ServiceProcess.OnStop()
      at System.ServiceProcess.ServiceBase.DeferredStop()
      at System.Runtime.Remoting.Messaging.StackBuilderSink._PrivateProcessMessage(IntPtr md, Object[] args, Object server, Int32 methodPtr, Boolean fExecuteInContext, Object[]& outArgs)
      at System.Runtime.Remoting.Messaging.StackBuilderSink.AsyncProcessMessage(IMessage msg, IMessageSink replySink)
      at System.Runtime.Remoting.Proxies.AgileAsyncWorkerItem.ThreadPoolCallBack(Object o)
      at System.Threading.ExecutionContext.Run(ExecutionContext executionContext, ContextCallback callback, Object state)
      at System.Threading._ThreadPoolWaitCallback.PerformWaitCallbackInternal(_ThreadPoolWaitCallback tpWaitCallBack)
      at System.Threading._ThreadPoolWaitCallback.PerformWaitCallback(Object state)
    </Data>
    <Data>ServiceTemplate</Data>
  </EventData>
  <RenderingInfo Culture='en-US'>
    <Message>
      The service ServiceTemplate has stopped.

      More Information:
      Excpetion Type:
      Base Type:
      Stack Trace:
      at ServiceTemplate.Service.ServiceProcess.OnStop()
      at System.ServiceProcess.ServiceBase.DeferredStop()
      at System.Runtime.Remoting.Messaging.StackBuilderSink._PrivateProcessMessage(IntPtr md, Object[] args, Object server, Int32 methodPtr, Boolean fExecuteInContext, Object[]& outArgs)
      at System.Runtime.Remoting.Messaging.StackBuilderSink.AsyncProcessMessage(IMessage msg, IMessageSink replySink)
      at System.Runtime.Remoting.Proxies.AgileAsyncWorkerItem.ThreadPoolCallBack(Object o)
      at System.Threading.ExecutionContext.Run(ExecutionContext executionContext, ContextCallback callback, Object state)
      at System.Threading._ThreadPoolWaitCallback.PerformWaitCallbackInternal(_ThreadPoolWaitCallback tpWaitCallBack)
      at System.Threading._ThreadPoolWaitCallback.PerformWaitCallback(Object state)
    </Message>
    <Level>Information</Level>
    <Task>General</Task>
    <Opcode></Opcode>
    <Channel></Channel>
    <Provider></Provider>
    <Keywords>
      <Keyword>Classic</Keyword>
    </Keywords>
  </RenderingInfo>
</Event>

Of course you may not want that much detail in your event log for informational messages like this one. The easiest way to achieve that is to separate the errors from the exceptions by creating another resx file with a different facility id (It can use the same event log/source, or a new one). For some uses this much detail is more than you want even for exceptions, but it should be obvious enough now how to modify this to prune out the data you don’t want. Our service is fairly complete now, it installs, run, logs, etc. We have a little more work to do in the service behavior itself to support some nice-to-have things like pause/continue, custom messages, etc.

Continued on “Building a Windows Service – Part 7: Finishing touches


Continued from “Building a Windows Service – Part 4: Extending the Service Installer

So with our installer working it would be nice to have a way to just run the install right from the command-line. There are several options here, one way would be to use the Process object, set the start parameters to not use shell execute, and just run and wait for exit. The other option, though a little ‘hackish’ is to leverage the fact that InstallUtil itself is a managed application. Because it is managed we can simply take the Assembly’s full path and hand it over to the AppDomain.ExecuteAssembly method. The nice thing about this approach is that we can capture and redirect output (via Console.SetOut()) or just let it do it’s thing. In addition, we have the luxury of not needing to encode and escape the command-line arguments, instead we just supply them as a string array. So let’s build a little utility class to deal with this for us:

class InstallUtil
{
    private readonly AssemblyName _assemblyName;
    private readonly string _baseDirectory;
    private readonly string _fileName;
    private readonly string _installUtilExe;

    public InstallUtil(Assembly assembly)
    {
        _assemblyName = assembly.GetName();
        _fileName = Path.GetFullPath(assembly.Location);
        _baseDirectory = Path.GetDirectoryName(_fileName);

        _installUtilExe = Path.GetFullPath(Path.Combine(RuntimeEnvironment.GetRuntimeDirectory(), "InstallUtil.exe"));
        if (!File.Exists(_installUtilExe))
            throw new FileNotFoundException("InstallUtil.exe not found.", _installUtilExe);
    }

    public void Install(IEnumerable<string> moreargs)
    {
        if (0 != Run(true, moreargs))
            throw new ApplicationException(String.Format("InstallUtil failed to install {0}.", _assemblyName.Name));
    }

    public void Uninstall(IEnumerable<string> moreargs)
    {
        if (0 != Run(false, moreargs))
            Console.Error.WriteLine("InstallUtil failed to uninstall {0}.", _assemblyName.Name);
    }

    private int Run(bool install, IEnumerable<string> moreargs)
    {
        string apppath = Environment.GetFolderPath(Environment.SpecialFolder.CommonApplicationData);
        string appdata = Path.Combine(apppath, _assemblyName.Name);
        if (!Directory.Exists(appdata))
            Directory.CreateDirectory(appdata);

        List<string> arguments = new List<string>(moreargs);
        if (!install)
            arguments.Add("/uninstall");
        arguments.AddRange(new []
                               {
                                   "/ShowCallStack=true",
                                   String.Format("/LogToConsole=true"),
                                   String.Format("/LogFile={0}", Path.Combine(appdata, "install.log")),
                                   String.Format("/InstallStateDir={0}", _baseDirectory),
                                   String.Format("{0}", _fileName),
                               });

        int result = AppDomain.CurrentDomain.ExecuteAssembly(
                _installUtilExe,
                AppDomain.CurrentDomain.Evidence,
                arguments.ToArray()
                );

        return result;
    }
}

And then we can simply crack open our Commands class from part 1 and add two more static methods:

public static void Install(ICollection<string> args)
{
    new InstallUtil(typeof (Program).Assembly)
        .Install(args);
}

public static void Uninstall(ICollection<string> args)
{
    new InstallUtil(typeof(Program).Assembly)
        .Uninstall(args);
}

Following that we add these methods to Program’s Actions dictionary and we are done. Now we can simply run our service exe with the commands we defined:

C:\Projects\ServiceTemplate> ServiceTemplate.exe install
C:\Projects\ServiceTemplate> ServiceTemplate.exe uninstall

Continued on “Building a Windows Service – Part 6: Adding resources and event logging


Continued from “Building a Windows Service – Part 3: Creating a Service Installer” In the previous post we created a rough draft of our service installer. In this post we will focus on extending the capabilities of the default ServiceInstaller class and enhancing the behavior of the default class. Here are the goals: Use declarative [...]


Continued from “Building a Windows Service – Part 2: Adding a Service to a Console Application” We are going to take this in two steps, first the minimal we need to do to make something *sorta* work, then we are going to get fancy. This post will focus on the first part, making something work. [...]

 
Building a Windows Service - Part 2: Adding a Service to a Console Application

Continued from “Building a Windows Service – Part 1: Getting started” So now that we’ve built ourselves a console application it’s time to add the service. Doing this is strait-forward and we can use the Visual Studio template for both the service and a basic installer. The first thing I’ve done is to create a [...]

 
Building a Windows Service - Part 1: Getting started

This is the first of what I hope to be a multi-part deep-dive into building managed Windows services. As with any task the first thing we need to discover is the why and what for. Services can be very useful for a number of situations. On the client side of things one might be using [...]


Well I went looking around for an XSD schema that could validate XML comments I place in code for documentation. Either Microsoft never delivered one, or I completely failed to find it. Amazing that I found many people looking for it, but nobody willing to write it. So I did, you can get it here: [...]