This plugin should now be functional on 64-bit installations of TortoiseSVN, use the x64 installation from:
https://github.com/csharptest/JiraSVN/archives/master
Let me know if you have any difficulties.
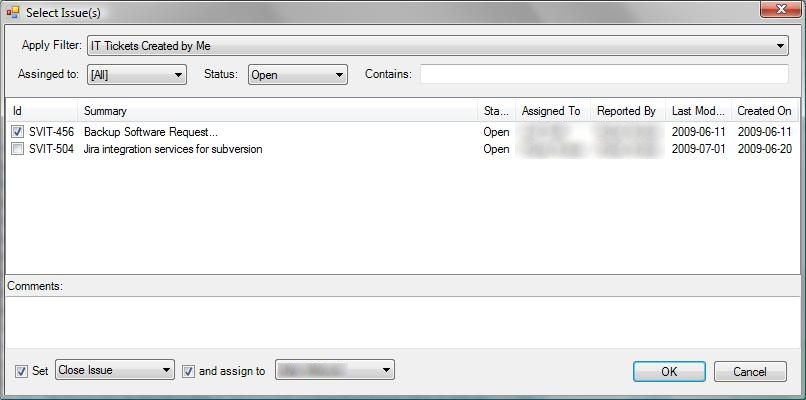
We use Jira and it’s one of the best ticketing systems I’ve used. Out of the gate it has some limited integration with subversion that allows you to see comments and changes associated with a defect. The hard part is you have to type the defect id into the comments. This tool is designed to fill that need. Integrated with the command-line checkin or TortoiseSVN this comment dialog allows you to pick one or more defects and can optionally resolve and reassign the issues. It can virtually replace the need to open the Jira web interface.
1. Install the Software
If not, try running %SystemRoot%\Microsoft.NET\Framework\v2.0.50727\RegAsm.exe with the full path to the SvnPlugin.dll file that was installed.
2. Enable Jira SOAP
3. Configure Subversion
Once this is complete, you will need to a new entry specific to this plugin…
At this point you can check in with the comment dialog from the command-line svn.exe by setting an environment variable:
SET SVN_EDITOR=C:\Progra~1\CSharpTest.Net\SvnPluginInstall\SvnEditor.exe
4. Configure TortoiseSVN
5. Enjoy
This plugin should now be functional on 64-bit installations of TortoiseSVN, use the x64 installation from:
https://github.com/csharptest/JiraSVN/archives/master
Let me know if you have any difficulties.